This DIY button key chain is super simple and can look a multitude of ways depending on what you want. I, of course, chose the pink theme to go along with my 31 Days of Pink for breast cancer awareness month. This is pretty easy and you could even do it while watching tv if you’re so inclined.
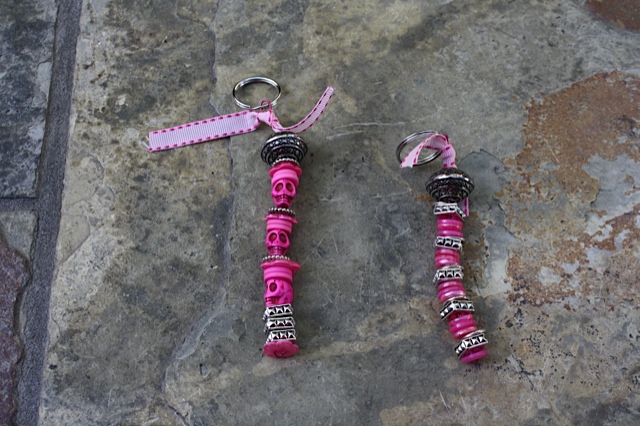
I decided to make two and definitely have enough materials to make more. Do I see an etsy account in my future?? haha
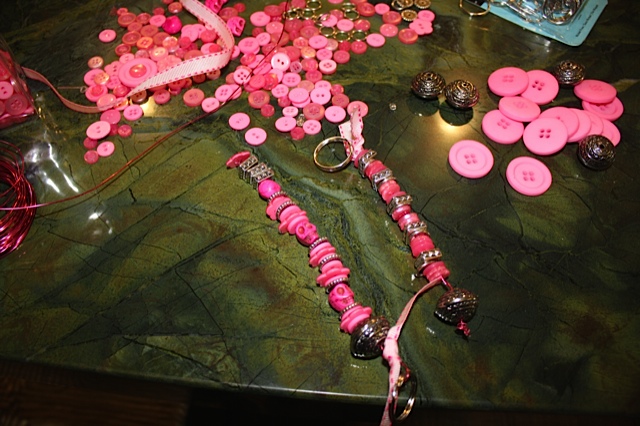
Here are the materials I used for the keychain:
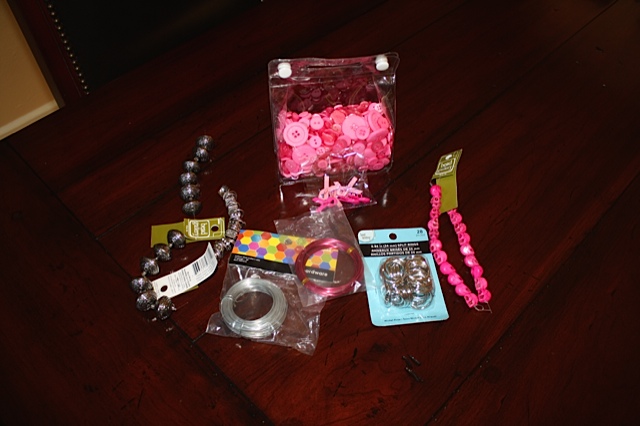
- pink wire
- assorted buttons
- assorted beads
- key rings
- ribbon
- scissors
- wire cutters
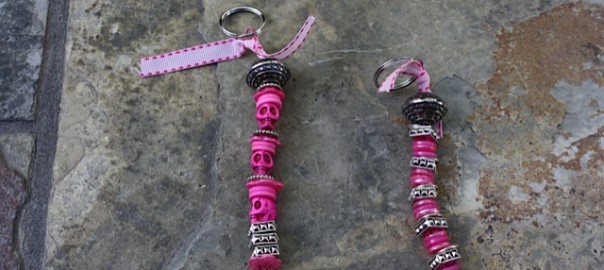
I have an obsession with these little skull beads and when I saw them in pink, I had to get them. I know they are definitely not for everyone so I made one without the skulls as well. But the sky is the limit with this project depending on what colors you want to use and what cute buttons and beads you can find.
Start with how much wire you think you’ll need depending on how long you want your key chain to be. It’s always best to start off with too much and trim as needed. The wire cutters are super simple to use.
Straighten your wire into like a ‘U’ and start adding buttons. I kind of lined my buttons out first into the order I wanted them to see how it would look.
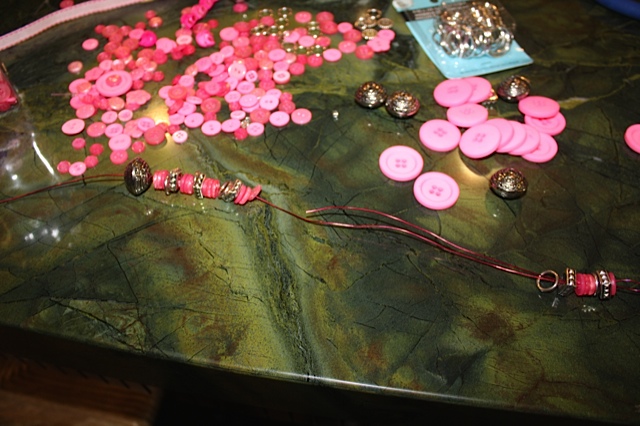
Thread the wire through one hole in the button and then back up through the other side. Leave a loop at the bottom of the first button. This is where you can attach the key ring. Continue threading all your buttons like this and end at the top with a bead. You can of course alternate beads with your buttons throughout the pattern.
Twist the wire together to secure all the buttons and beads. You could leave a loop at this end to affix the key ring if you prefer..
I tried to put the wire back down through the bead to hide the end of the wire so it didn’t stick out and poke anyone. I then tied a ribbon around the end where I twisted it to make sure any sharp ends were covered.
Depending on your beads, you’ll have to decided what is the best way to twist the wire to secure it so it is not sharp.
This project definitely had the most trial and error for me.
Let me give you some tips based on my experience:
- Make sure the holes in your beads will be big enough for the wire to fit through.
- Try not to manipulate the wire too much. The more it bends the harder it is to get the buttons on.
- Make sure you know on which end you’ll put the key ring. My first go around I had my skulls upside down. No bueno!
-
Skulls on the wrong way! No bueno! - Try not to buy too many different size buttons. I had too much of a variety and had a hard time always finding liked size buttons to stick with my pattern. Of course, you really don’t need a pattern that’s just how I chose to do it.
- When you are finished adding beads and buttons, make sure you are able to twist the end of the wire in a way so it doesn’t poke you. It can be pretty sharp.
All in all these turned out pretty cute and are actually functional.
Doing projects like these makes me wish I had discovered my craft gene when my kids were younger. But, better late than never.
Salty Kisses,
Karen